1. General Concept
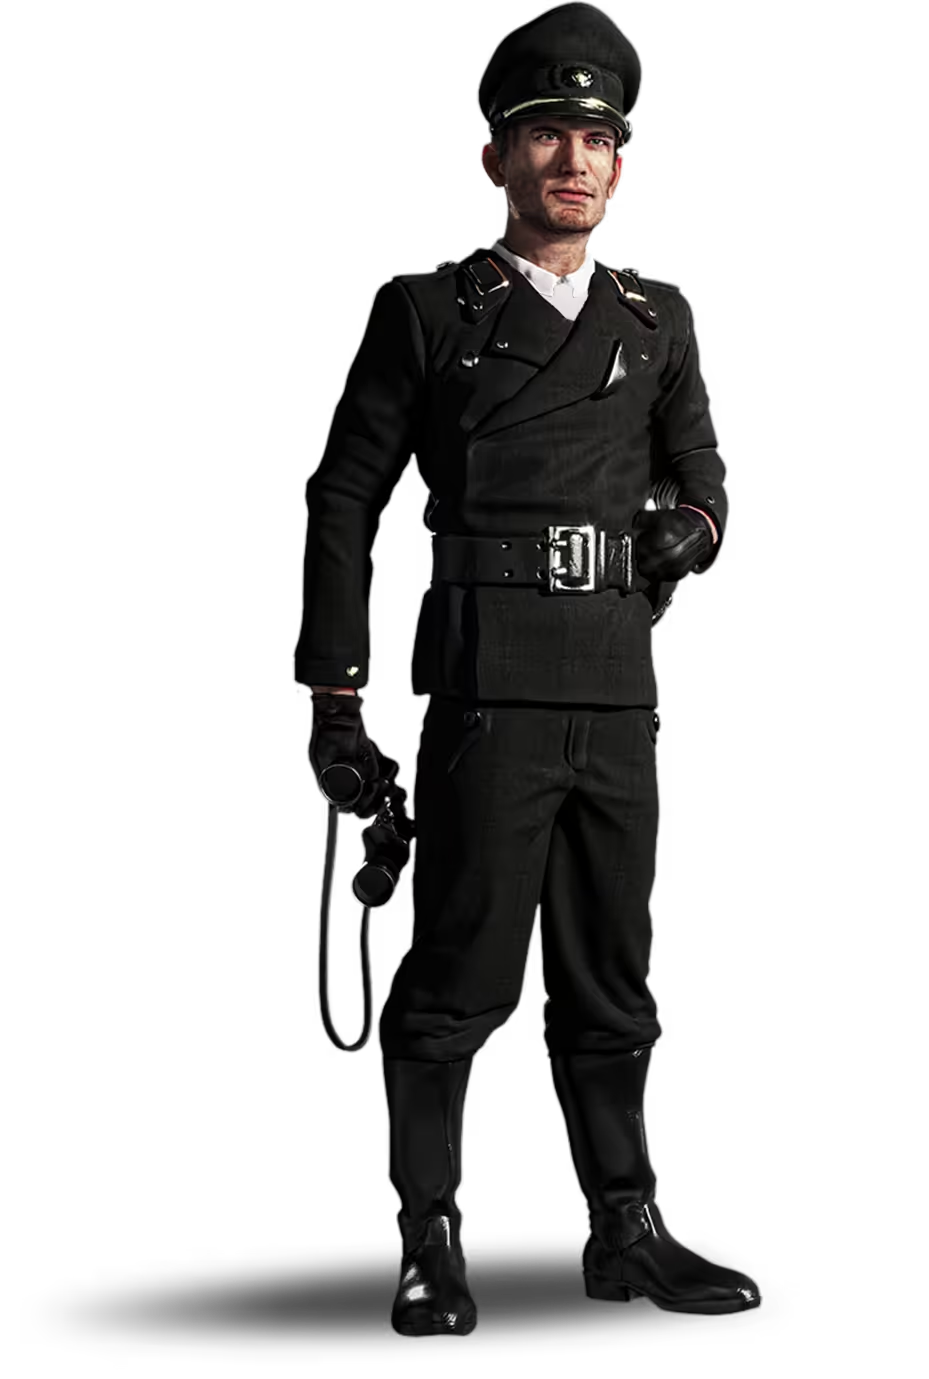
The game is a WW2-themed browser strategy game in which each player manages one or more cities. The main objectives are economic development, building an army, forming alliances (coalitions), and conquering territory. A coalition wins the server if it manages to control 70%+ of the map's territory for 10 consecutive days.
2. Resources
There are 4 types of resources:
| Resource | Produced by | Used for |
|---|---|---|
 Metal Metal |
Metal Mining Camp | Building construction, troop recruitment |
 Oil Oil |
Oil Extractor | Construction, recruitment, fuel for troops/patrols/attacks |
 Aluminum Aluminum |
Aluminum Smelter | Building construction, troop recruitment |
 Rations Rations |
Not produced by any dedicated building — accumulates hourly proportional to the city's current free/unoccupied population (see Population and Rations below) | Feeding troops — but ONLY troops in active movements (attack/patrol/reinforcement/espionage/expedition), never stationed troops or the city itself |
- Each resource building's production increases significantly with level: from ~15/hour at level 0, up to over 1200/hour at level 40.
- Production is affected by bonuses (Premium Account: +25%, temporary effects, etc.).
- Transporting resources to another player (peaceful trade) is done exclusively with Trucks (250 resources/truck), through the Commercial Zone building — Transport Planes CANNOT be used to trade between players, only Trucks (see the "Trading with other players" section below for full details).
- Looting resources (following a won attack) is limited by the protected percentage of Storage and by the attacking troops' carrying capacity.
3. Trading with other players (Commercial Zone)
Trading is the mechanism that lets you send resources to any other player in the game, peacefully. There are two ways to trade:
Direct shipment (transport to a known address)
- You manually choose the destination city (of any player, regardless of coalition/diplomacy) and the amount of resources you want to send.
- The shipment is carried out exclusively by Trucks — never by Transport Planes. The number of trucks needed = total amount of resources divided by a truck's capacity (250), rounded up.
- The shipment happens automatically, without any confirmation from the recipient — the resources arrive guaranteed, at the normally calculated travel time (distance + truck speed, affected by weather).
- After delivery, the trucks used automatically return to the origin city.
- There is no fee or commission — resources arrive 1:1, with no losses.
- There is no diplomacy restriction — you can send resources to any player, whether you're allied, at war, or have no relationship at all; the only condition is that the destination city must not be barbarian (a barbarian city cannot receive resources).
- There is no maximum resource limit per shipment — the only limitations are how many resources you have available, how many Trucks you have available in the city (the number of trucks needed cannot exceed the trucks you own), and how many simultaneous shipments your Commercial Zone allows.
Market offers (public marketplace — "I offer X, I want Y")
- You can post a public offer: "I offer X resources of one type, I want Y resources of another type", visible to all players (similar to a marketplace/exchange).
- The exchange rate is limited: the ratio between the requested quantity and the offered quantity cannot exceed 2.5:1 in either direction (you can't, for example, ask for 10 times more than you offer — the system rejects offers with an unrealistic exchange rate).
- When the offer is posted, the offered resources and the trucks/shipments needed are reserved immediately (deducted from the city) — even before anyone accepts the offer.
- An offer can have repeats: essentially, it's as if you posted the same offer multiple times at once, so you don't have to repeat it manually. For example, an offer with 5 repeats means that trade can be accepted up to 5 times in total (by the same player or by different players), until all repeats are used up. You are not required to accept all the repeats at once — you can accept only part of them, and the rest remain available for others.
- An offer can also be set with "any resource" (
any) as the requested type — whoever accepts chooses what combination of resources to pay, as long as the sum matches the requested quantity. - When posting the offer, the author also sets a maximum accepted travel time (between 1 and 168 hours) — essentially, how far away (in travel hours) they are willing to accept a trading partner. This value is used as a filter in the public offer list: a player can see/accept an offer only if the actual travel time to their city stays within the limit set by the offer's author.
- When someone accepts the offer: two simultaneous Truck shipments are created — one with the resources promised by the offer's author heading to the acceptor, and one with the acceptor's payment heading to the offer's author — both with the same travel time (same distance). Each party receives a transaction report.
- Unclaimed offers can be manually cancelled by the author (the reserved resources and shipments are released back). Offers do not expire automatically — they remain active until either accepted (fully or partially, within the limit of available repeats) or manually cancelled by the author.
- Warning — offers do NOT protect your resources from an attack: resources placed in an active offer are deducted from the city and set aside (pending), but they still belong to your city and remain exposed to looting. If your city is successfully attacked and the attacker still has carrying capacity left after looting your normally stored resources, the game automatically cancels (partially or fully, starting with the oldest) your active offers and adds those resources to the attacker's loot — in other words, putting resources into an offer is not a way to shield them from an attack.
- The Commercial Zone must exist (minimum level 1) both for the player who sends/posts the offer and for the player who accepts an offer.
Simultaneous shipment limit
- The level of the
 Commercial Zone building determines how many shipments (resource transfers) you can have active simultaneously — the formula is simple: level = maximum number of shipments (level 1 → 1 simultaneous shipment, level 20 → 20 simultaneous shipments, maximum).
 - This limit applies to both direct shipments and posted/accepted offers — each shipment "occupies" a slot until it reaches its destination and the truck returns.
- If you've reached the limit, you cannot send/post/accept another shipment until a slot frees up.
4. Storage and Resource Protection
- The
 Storage building determines the city's total storage capacity, which increases from 500 at level 0 to 30,000 at level 30.
 - Capacity distribution per resource: the total capacity is not automatically split equally — the player can redistribute percentages of how much of the total capacity goes to each resource (Metal / Oil / Aluminum / Rations), from the Storage building's interface.
- The 4 percentages must always add up to 100% (the interface shows an error if the sum isn't exactly 100%).
- The default/recommended configuration (also used as a tutorial goal) is 20% Aluminum / 20% Oil / 40% Metal / 20% Rations, but it can be adjusted at any time afterward, depending on the player's strategy (for example, more space for Metal if you're recruiting many metal-expensive troops).
- Each resource's effective capacity = the Storage building's total capacity × the percentage allocated to that resource.
- If you lower a resource's percentage below the amount already stored, you risk the resulting surplus exceeding the new capacity (see the Overflow rule below) — the interface visually warns when the new capacity would be lower than the resources currently held.
- Why storage percentages matter for military strategy: troops don't all have the same "manufacturing cost" — each army category consumes a different combination of resources, which turns redistributing Storage percentages into a real strategic decision, not just a cosmetic one:
- Infantry (Infantryman, Machine Gunner, Bazooka Soldier, Sniper, Spy, Medic, Officer, General) is recruited exclusively with Metal. A player relying on large, cheap, numerous infantry armies needs a generous Metal storage, otherwise production is wasted over capacity as soon as you can't recruit fast enough.
- Armored vehicles (Truck, Anti-Tank, Anti-Air, Tanks) require Metal and Oil — the heavier the tank (Light → Medium → Heavy), the more proportionally both resources are needed. A strategy focused on armor requires a balance between Metal and Oil space.
- Aviation (Spy/Transport/Fighter planes, Close Air Support, Bombing Planes) is the only category that consumes all three industrial resources at once (Metal, Oil and Aluminum), and is also the most expensive per unit. A strong air fleet requires a consistent percentage allocated to each resource, especially Aluminum, used almost exclusively by air units.
- Practical conclusion: production buildings (including their upgrades) also need a mix of all resources, so none becomes completely useless regardless of the chosen strategy — but the ideal ratio changes drastically depending on the military branch the player is focusing on. A player focused on infantry can reduce the Aluminum percentage in favor of Metal and Rations; one who builds an air fleet or an armored corps needs to proportionally increase Oil and, for aviation, Aluminum — otherwise they risk either producing resources the storage can no longer hold (wasted surplus), or not being able to recruit the desired troops fast enough due to lack of capacity. Periodically re-evaluating Storage percentages as the military strategy evolves (for example, switching from infantry to aviation) is part of efficient city management.
- Loot protection: a fixed 5% of the capacity allocated to each resource is always "safe" and cannot be stolen in an attack — this percentage is constant, regardless of the Storage building's level (it doesn't increase with level).
- Example: at an allocated capacity of 1000 metal, 50 is protected (5%) → an attacker can steal at most 950, further limited by their troops' carrying capacity.
- Surplus / Overflow: if accumulated resources exceed the maximum capacity allocated to that resource, any unit of resource over the limit blocks population in the city — for every 50 units of surplus (summed across all resources), 1 population available for construction/recruitment is lost/blocked. In practice, it's recommended not to let resources accumulate over capacity.
5. Population and Rations
Population
- A city's maximum population capacity is determined by the
 Farm building's level — each Farm level directly increases the city's total population capacity.
 - The city's available population permanently decreases by the population cost of each building built/upgraded and each troop recruited (each troop type has a fixed population cost — for example, an Infantryman costs 1 population, a heavy tank costs 5, etc.).
- Troops stationed in a city (not sent anywhere) do NOT consume rations recurringly — they simply occupy a permanent "slot" from the city's population, for as long as they exist. Occupied population is only freed when the troop dies (in combat, starvation, etc.) or is sent outside the city through attacks / reinforcements, etc.
- When you send troops on a mission (attack, patrol, espionage, reinforcement, expedition), the population occupied by those troops is immediately freed in the origin city (it no longer stays blocked while the troops are away) — practically, the city can use that freed population to produce rations or to recruit other troops/build other buildings in their absence. The game still keeps a separate record of population "outside the city" (troops away), used only for display and internal calculations, not as an additional population block, which can be observed by clicking or hovering over the "population" text at the top, next to resources.
Rations — how they're produced
- Rations are not continuously produced by any dedicated building (unlike Metal/Oil/Aluminum, which each have their own production building).
- Instead, rations accumulate passively proportionally to the city's free/unoccupied population: the more available population you have (not consumed by buildings or recruited troops), the more rations the city produces per hour — practically, unenlisted citizens work the land and feed the city.
- Rations accumulate continuously, just like the other resources (Metal/Oil/Aluminum) — not through a single calculation, but hour by hour, from the city's last resource update until now.
- The difference is the rate used: for Metal/Oil/Aluminum, the hourly rate comes from a dedicated building (Metal Mining Camp/Oil Extractor/Aluminum Smelter), while for rations, the hourly production rate is exactly the city's current available (unoccupied) population — the more free population you have, the more rations are added per hour, just like a production building would generate more at a higher level.
- Like any resource, accumulation is limited by the storage capacity allocated to rations in the Storage building — once the maximum capacity is reached, rations no longer increase beyond that ceiling.
- Practical implication: if you recruit a lot of troops (consuming a lot of population), your ration production drops, because less free population remains to generate rations — you need to balance your army with your food needs.
Rations — how they're consumed (only for troops ON THE MOVE)
- Ration consumption doesn't apply to the city as a whole, nor to stationed troops — it applies exclusively to each individual movement (attack, patrol, reinforcement, espionage, expedition) actually in transit.
- When a movement is sent, it receives its own ration stock, allocated once at departure (it isn't resupplied from the origin city along the way).
- Once a day (at midnight, server time), an automatic process checks each active movement and calculates its ration requirement (consumption per troop × number of troops involved). If the movement's allocated stock doesn't cover the requirement, that movement loses power — see below. If the stock covers the requirement, the allocated rations are consumed normally and the movement continues unaffected.
What "Power" means
- Power is a percentage indicator (0-100) of a movement's (attack/reinforcement/etc.) efficiency status — starting at 100% by default when sent.
- Power decreases only due to lack of rations allocated to that movement: at each daily check, if the allocated rations don't cover the requirement, power decreases by a percentage proportional to the ration deficit, up to a maximum of -25 points per check.
- Power's effect on combat: when a movement with reduced power reaches combat, ALL of its troops' relevant stats (health, attack, attack against buildings, anti-infantry defense, anti-air, anti-armor) are reduced proportionally to the power deficit. For example, at 70% power, all these stats are reduced by 30%. In other words, power is a general efficiency multiplier in combat — the lower it is, the weaker that force is in every respect, not just attack.
- Power can be restored, but the mechanism differs between attacks and reinforcements:
-
For an ATTACK whose troops automatically remain stationed at the destination — this only happens in two specific situations, not on every won attack:
- The attack succeeds in conquering the city — the attacking troops automatically remain in the newly conquered city, as its first garrison.
- You send an attack (not a reinforcement) to a city that is already under siege (has an ongoing conquest), and that siege belongs to you or an ally/coalition member — in this case, your attack automatically converts into a reinforcement and joins the ongoing siege directly, stationing itself in that city.
In both cases, when the troops become stationed, they restore their power by consuming rations from the destination city.
- Practical example: the attack arrives at the destination with 70 power (i.e., -40 points, from lack of rations en route). The system calculates how many rations would be needed for those troops to restore their power to 100% (proportionally to the population occupied by the troops and the ration consumption rate) and subtracts that amount from the destination city's rations.
- If the destination city has enough rations available → power rises directly to 100%, and those rations are consumed from the city's stock.
- If the destination city doesn't have enough rations to cover the whole deficit → it consumes everything it has available, and power rises only partially, proportional to how much of the deficit could be covered (for example, if the city could only cover half the deficit, power rises to 80% instead of 100%).
- If the destination city already has enough free population to house those troops without additional ration cost, power is automatically restored to 100% without consuming anything.
- This restoration method (once, upon stationing) does NOT apply to reinforcements explicitly sent to a city — they work differently, see below.
-
For a REINFORCEMENT already arrived and stationed in a city, power restoration is checked every night, not just once upon arrival: the system calculates the reinforcement's ration requirement for that day and checks whether the host city can fully cover it from its own rations.
- If the host city can cover the entire requirement → the reinforcement's power rises directly to 100%, and those rations are subtracted from the city's stock.
- If the host city CANNOT cover the entire requirement → power doesn't rise to 100%, but instead decreases further, proportional to how much of the requirement was missing (up to a maximum of -25 points per night, same as for a movement in transit).
- Practically, a stationed reinforcement only returns to 100% power on the night the host city can fully cover its ration requirement; otherwise, power decreases proportionally to the deficit, exactly like a movement in transit.
-
What doesn't restore automatically: a movement (attack or reinforcement) still "en route" (hasn't reached its destination) relies strictly on its own ration stock allocated at departure — it cannot regain power while en route, regardless of the situation. It can only continue losing power at daily checks if its own stock isn't enough.
-
What happens at Power = 0 (complete starvation)
- If power reaches 0, the troops in that movement starve to death: the movement is permanently canceled, and all involved troops are completely lost (involved planes are subtracted from the active plane count, associated reinforcements are destroyed, etc.).
- A "Starved Attack" report is automatically generated for the player who sent the movement; if the movement had already been detected or was close to its destination, the defender also receives a corresponding report.
- Recommendation: don't send very long-duration movements without enough allocated rations, and maintain a healthy level of free population in your cities to have constant ration reserves available when sending new missions.
6. Buildings
There are 13 building types in each city. Below: a general table (max level, requirements, role) and a separate table with the bonus given by each building per level.
General table
| Building | Max Level | Requirements | Role |
|---|---|---|---|
 Main Building Main Building |
25 | No requirements | City center; conditions many other buildings/troops; produces points |
 Barracks Barracks |
20 | Main Building level 3 | Recruits infantry (Infantryman, Machine Gunner, Sniper, Bazooka Soldier, Spy, Medic, Officer); produces points |
 General's Office General's Office |
3 | Main Building level 10 + Barracks level 10 (level 2→3 requires Main Building 20 + Barracks 20) | Recruits Generals; produces points |
 Metal Mining Camp Metal Mining Camp |
40 | No requirements | Metal production; produces points |
 Oil Extractor Oil Extractor |
40 | No requirements | Oil production; produces points |
 Aluminum Smelter Aluminum Smelter |
40 | No requirements | Aluminum production; produces points |
| Farm |
40 | No requirements | Increases the city's population capacity (rations are produced separately, from free population — see section 5) |
 Armored Factory Armored Factory |
15 | Main Building level 7 | Recruits armored vehicles (Truck, Anti-Tank, Anti-Air, Light/Medium/Heavy Tank); produces points |
 Airport Airport |
20 | Main Building level 10 | Unlocks aviation; produces points |
 Plane Factory Plane Factory |
15 | Airport level 1 | Recruits planes (Spy Plane, Transport Plane, Fighter, Close Air Support, Bombing Plane); produces points |
| Storage |
30 | No requirements | Increases resource storage capacity (5% of stored resources are permanently protected from looting, regardless of level); produces points |
| Commercial Zone |
20 | Main Building level 3 + Storage level 2 | Allows resource transactions/transports to other players; produces points |
 Fortifications (Wall) Fortifications (Wall) |
25 | Barracks level 1 | Percentage defense bonus for your own troops in the city; produces points |
Bonus per level
| Building | Bonus formula | Level 1 → Level 10 → Max | What the bonus means |
|---|---|---|---|
| Main Building |
level × 2 |
2 → 20 → 50 | Reduces the time (in %) of all construction/upgrade orders in the queue. Each time the Main Building is upgraded, remaining queued orders are automatically recalculated with the new reduction percentage |
| Barracks |
level × 2 |
2 → 20 → 40 | Reduces recruitment time (in %) per infantry unit — at level 20, recruitment is 40% faster |
| General's Office |
level |
1 → — → 3 | The number of Generals you can recruit/own (1 at level 1, up to 3 at max level) |
| Metal Mining Camp |
30 × level (level 0 = 15, base value before first construction) |
30 → 300 → 1200 | Amount of Metal produced per hour |
| Oil Extractor |
30 × level (level 0 = 15, base value before first construction) |
30 → 300 → 1200 | Amount of Oil produced per hour |
| Aluminum Smelter |
30 × level (level 0 = 15, base value before first construction) |
30 → 300 → 1200 | Amount of Aluminum produced per hour |
| Farm |
level × 200 |
200 → 2000 → 8000 | The city's maximum population capacity (how many inhabitants you can have in total, used for troop recruitment and buildings) — rations consumed/produced are calculated separately, from free population (section 5) |
| Armored Factory |
level × 2 |
2 → 20 → 30 | Reduces recruitment time (in %) per armored vehicle unit — at level 15, recruitment is 30% faster |
| Airport |
level × 50 |
50 → 500 → 1000 | Maximum hangar capacity (how many planes you can own/station simultaneously) |
| Plane Factory |
level × 2 |
2 → 20 → 30 | Reduces recruitment time (in %) per plane unit — at level 15, recruitment is 30% faster |
| Storage |
≈ level × 1000 |
1000 → 10000 → 30000 | Maximum storage capacity for each resource (Metal/Oil/Aluminum/Rations, split according to percentages allocated by the player). The percentage protected against looting is a fixed 5% at any level; above capacity, every 50 units of excess blocks 1 population |
| Commercial Zone |
level |
1 → 10 → 20 | Maximum number of active simultaneous commercial transports (resource shipments) to other players |
| Fortifications (Wall) |
level × 4 |
4 → 40 → 100 | Percentage bonus multiplicatively applied to the defense stats of all own troops in the city, only for anti-infantry (full bonus) and anti-armor/artillery (half the bonus) — it does not grant any bonus to anti-air defense. At level 25: +100% anti-infantry and +50% anti-armor/artillery |
General construction rules
- Each upgrade has a cost in Metal/Oil/Aluminum, a population cost, and a construction time that both increase with level.
- You can queue multiple upgrades simultaneously; resource costs are deducted immediately upon adding to the queue, not upon completion.
- Construction queue capacity is limited: maximum 2 orders simultaneously for normal accounts, and maximum 5 orders simultaneously for accounts with an active Premium Account.
- Buildings (and troops) can have requirements — other buildings that must have a minimum level before you can build/recruit.
- You can speed up or instantly finish a queued order using Premium Points.
What a building's "tier" means
In the game, "tier" describes a building's stage of development, based on its current level:
- Tier 1: early levels (below the building's first visual evolution threshold)
- Tier 2: intermediate levels (past the first threshold, but below the second)
- Tier 3: advanced levels (from the second threshold upward)
This system matters especially for building destruction: some units can only affect lower-tier buildings, while others can hit any tier.
7. Troops
There are 19 troop types, divided into 3 categories, each with its own stats: health, attack, attack range, anti-infantry defense, anti-armor/artillery defense, anti-air defense, population cost, resource cost, recruitment time, movement speed, and carrying capacity.
Infantry (recruited at Barracks)
| Troop | Role | Requirements |
|---|---|---|
 Infantryman Infantryman |
Basic, balanced unit | Barracks level 1 |
 Machine Gunner Machine Gunner |
Anti-infantry specialist (high attack vs infantry) | Barracks level 2 |
 Sniper Sniper |
High ranged attack, very fragile, good anti-infantry | Barracks level 5 + Main Building level 5 |
 Bazooka Soldier Bazooka Soldier |
Anti-armor specialist | Barracks level 3 |
 Spy Spy |
Used exclusively for espionage missions | Barracks level 3 |
 Medic Medic |
Heals wounded troops | Barracks level 3 + Main Building level 5 |
 Officer Officer |
Logistics command unit — required to conquer a city (a conquest attack requires 5 officers present, plus a selected General) and to chain reinforcements already stationed (used to combine/redirect a chain of reinforcements); | General's Office level 2 |
Armored vehicles (recruited at Armored Factory)
| Troop | Role | Requirements |
|---|---|---|
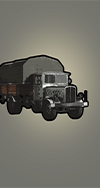 Truck Truck |
Fast transport — carries resources (250) or troops (25) | Armored Factory level 1 |
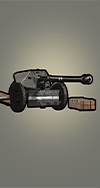 Anti-Tank Anti-Tank |
Counters armor | Armored Factory level 3 |
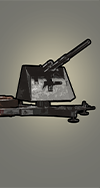 Anti-Air Anti-Air |
Strong air defense | Armored Factory level 3 |
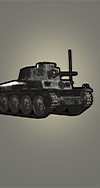 Light Tank Light Tank |
Fast tank, moderately armored, can destroy tier 1 buildings | Armored Factory level 5 |
 Medium Tank Medium Tank |
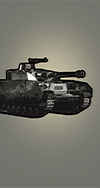
Balanced tank, can destroy tier 1-2 buildings | Armored Factory level 8 |
 Heavy Tank Heavy Tank |
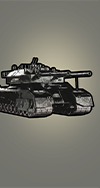
Slow tank, very powerful, can destroy buildings of any tier | Armored Factory level 12 |
Aviation (recruited at Plane Factory, requires Airport)
| Troop | Role | Requirements |
|---|---|---|
 Spy Plane Spy Plane |
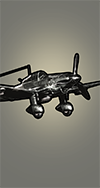
Fast aerial reconnaissance | Plane Factory 1 + Airport 1 |
 Transport Plane Transport Plane |
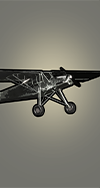
Large aerial transport (100 troops / 1000 resources) | Plane Factory 1 + Airport 1 |
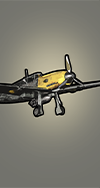 Fighter Fighter |
Air superiority, strong anti-air defense | Plane Factory 3 + Airport 1 |
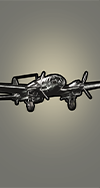 Close Air Support Close Air Support |
Ground attack from the air, very high attack | Plane Factory 5 + Airport 3 |
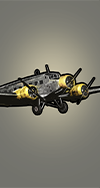 Bombing Plane Bombing Plane |
Mandatory for building bombing raids; can destroy buildings of any tier | Plane Factory 10 + Airport 5 |
Special unit
 General — recruited at General's Office (level 3), grants large attack or defense bonuses to the entire army sent with it. Mandatory for conquest — a conquest attack cannot be sent without a selected General (in addition to the required number of Officers).
Airport capacity (hangar) — how it works
- The Airport has a single maximum capacity shared by all plane types (Spy Plane, Transport Plane, Fighter, Close Air Support, Bombing Plane) — there is no separate limit per plane type, just one total "cap":
Airport level × 50(50 at level 1, up to 1000 at level 20). - This capacity counts all planes you own, regardless of where they are: those actually stationed in the city, those currently away on any type of mission (attack, patrol, espionage, reinforcement sent, expedition), and those already in the recruitment queue. As long as you own a plane, it occupies a slot from the total capacity, even if it isn't physically in the city.
- You cannot recruit planes beyond the Airport's available capacity — if you want to recruit more planes, you must either wait for space to free up (planes lost in combat, for example), or upgrade the Airport.
- Recruiting planes requires a minimum Airport level of 1 — without a built Airport, the Plane Factory cannot produce planes at all.
- When planes return from their own mission (attack, patrol, espionage, etc.), they return to the city normally, with no capacity-related issues.
- Reinforcements with planes sent to another city: if the host city no longer has enough room in its Airport to receive those planes, only the planes from that reinforcement are rejected and sent back to the origin city (the rest of the troops in the same reinforcement, if not planes, are accepted normally) — the reinforcement's owner and the host each receive a report explaining what happened.
- Practical recommendation: upgrade the Airport ahead of time if you're planning a large air fleet, and always check the destination city's available capacity before sending planes as reinforcement — otherwise you risk the planes making the trip for nothing and having to return.
Carrying capacity
| Unit | Troops carried | Resources carried |
|---|---|---|
| Truck | 25 | 250 |
| Transport Plane | 100 | 1000 |
How it works exactly (Truck and Transport Plane):
- Truck — the capacity of 25 troops and 250 resources overlap, they don't add up: each Truck has a single total "space", split either for troops or resources, never fully for both at once.
- A Truck can only carry infantry (Infantryman, Spy, Machine Gunner, Bazooka Soldier, Sniper, Medic, Officer) and Anti-Tank / Anti-Air.
- Of these, Anti-Tank and Anti-Air are considered "heavy weapons": each unit occupies a Truck entirely — no room is left for resources on that truck.
- The rest of the infantry only proportionally occupies the 25 available slots — the remaining unoccupied slot is proportionally converted into resource capacity (e.g., if you've filled half the troop slots of the trucks, half of the 250 resources/truck capacity remains available).
- Practically: the more troops you carry in a Truck, the fewer resources that same Truck can carry, and vice versa.
- Transport Plane — works with the same overlapping logic as the Truck: the capacity of 100 troops and 1000 resources is split from the same total "space" per plane.
- The Transport Plane only carries infantry (Infantryman, Spy, Machine Gunner, Bazooka Soldier, Sniper, Medic, Officer) — it doesn't have a "heavy weapons" category like the Truck.
- Troops proportionally occupy the 100 available slots per plane — the remaining unoccupied slot is proportionally converted into resource capacity (e.g., if you've filled half the troop slots of the planes, half of the 1000 resources/plane capacity remains available).
- Practically: the more troops you carry in a Transport Plane, the fewer resources that same plane can carry, and vice versa.
- The rest of the units (infantry, armor, combat planes) have their own resource carrying capacity (
carryCapacity), separate and independent, used only for looting/trade, regardless of whether they are accompanied by a Truck/Transport Plane or not.
Destroying buildings (raids)
A raid-type attack can use exclusively planes — you cannot include infantry, armored vehicles, or Trucks/Transport Planes in a raid. Allowed troops are only:
- Fighter
- Close Air Support
- Bombing Plane — the only unit that can effectively destroy the target building in a raid.
Tanks (Light/Medium/Heavy Tank) can destroy buildings only in a normal attack (not a raid), depending on the maximum "tier" they can affect (see the explanation above, under "What a building's tier means"):
- Light Tank — can affect tier 1 buildings
- Medium Tank — tier 2
- Heavy Tank and Bombing Plane — tier 3 (the most advanced)
8. Generals
Generals are special command units, each with a unique bonus (attack or defense) assigned to the city or army sent with them:
| General | Bonus | Type |
|---|---|---|
| Georgy Zhukov | +300% Defense | Starting General, automatically given to new players (automatically removed when you reach 1000 points) |
| Erwin Rommel | +35% Attack | Offensive |
| René Altmayer | +35% Defense | Defensive |
| Giovanni Messe | +30% Defense | Defensive |
| Hideki Tojo | +30% Attack | Offensive |
- Critical rule: without a selected General, you cannot send a conquest attack. In addition to the General, conquest also requires the minimum number of Officers.
9. Defensive Strategies and Combat Mentalities
- A defensive strategy is a formation (grid) in which you position your troops for defense — you can choose what type of unit stands in the front line, which in the support line, and which in the air line. A city can have only one active strategy at a time.
- Strategies aren't just a few predefined ones: you can create your own strategies (presets), name them however you want, then choose which strategy to activate on the city or which strategy to use when sending a mission.
- In short: you build your own strategy (unit arrangement + desired mentality), save it, and then reuse it for defense or various movements.
- Where to find this in the interface:
- To create/edit/delete strategies: open the Leadership menu (icon in the top bar), then click Manage Strategies.
- To set the city's defensive strategy: in the same Leadership menu, at Select Strategy, choose the strategy and confirm.
- Your strategies aren't just used as a "city strategy". When you send troops on missions, the game uses the selected strategy for that movement.
- Where you can/must select a strategy when sending:
- Attack: a valid strategy must be selected; without it the order is rejected.
- Attack Interception (attackIntercept): a valid strategy must be selected; without it the order is rejected.
- Expedition: a valid strategy must be selected; without it the order is rejected.
- Patrol: strategy becomes mandatory when you enable Attack on Sight (the patrol will automatically engage combat upon detection). Without Attack on Sight, a patrol can be sent without a strategy.
- Combat mentality determines the army's tactical (AI) behavior in a battle — there are 4 mentalities:
| Mentality | Description |
|---|---|
| Blitzkrieg | Fast attack — troops try to encircle and strike from the flank, high risk |
| Bulwark | Solid defense, impenetrable formation, defensive priorities |
| Conserve Troops | Economical strategy, avoids risky maneuvers, minimizes losses |
| Maximize Damage | Prioritizes maximum damage dealt to the enemy, regardless of own losses |
10. Combat System
The flow of an attack
- You send troops toward the target city.
- Travel time is calculated based on distance and the movement speed of the slowest troop in the group (adjusted by the server's speed multiplier).
- Upon arrival, the game first determines the global modifiers of the confrontation (weather, General bonuses, and the attacker's luck factor between -30% and +30%), then simulates the battle in rounds: each round, troops reposition according to the chosen strategy/mentality and apply their damage using these already-established values.
- The defended city's Fortifications level (0-25) adds an additional defense bonus.
- At the end: casualties on both sides, possibly looted resources and damaged buildings; a combat report is generated and sent to both players.
What "stalemate" means in a battle
- Exact condition: a stalemate occurs when the simulation ends (max 100 rounds) and troops remain alive on both sides.
- If one side is completely eliminated, it's no longer a stalemate, but a clear victory for the other side.
- In the report, this result appears as Stalemate.
- There can be losses on both sides; a stalemate doesn't mean "no casualties", it means "no total elimination of one side".
- What happens after a stalemate depends on the mission type:
- in a normal (simple) attack, a stalemate doesn't produce the effects of a victory (no resources are stolen and no building destruction applies), and the attacker retreats with the remaining troops;
- in a raid (aerial), the destruction objective isn't considered successful in a stalemate (you don't get the building destroyed as in a victory);
- in a spy attack, a stalemate is treated as a failed mission: you don't receive the attacker's intelligence report;
- in an interception, the target attack continues on its way, while the interception retreats with survivors;
- in a patrol (Attack on Sight), the detected attack isn't destroyed in a stalemate (it continues on its way), and the patrol remains with its surviving troops;
- in an expedition (hostile encounter), a stalemate is treated as "no victory" for the expedition: you only return with the troops that survived (if any remain);
- in a conquest, the city isn't conquered unless the attacker achieves a decisive victory.
Attack types
| Type | Description |
|---|---|
| Normal attack | Loots resources, kills troops, may damage buildings |
| Conquest | Permanently takes over the city — requires a decisive victory over the defender |
| Raid (aerial) | Destroys a specific building; requires a Bombing Plane in the attacking force; the Fortifications defense bonus is not taken into account for this attack type, since the battle is fought exclusively in the air |
| Spy Attack | Aerial intelligence incursion; requires a Spy Plane and may only include Spy Plane/Fighter/Close Air Support; doesn't loot resources and doesn't conquer |
Additional tactical positioning mechanics
Besides strategy and mentality, four more tactical mechanics related to troop positioning on the grid come into play during the round-based battle simulation, influencing the final result:
- Night bonus: between 00:00 and 07:59 (server time), all defending troops (except in barbarian cities) receive double anti-infantry and anti-armor/artillery defense — anti-air defense is not affected. Practically, an attack timed to arrive at the destination during this time window faces much stronger ground defense than during the rest of the day.
- Encirclement bonus: if a unit in the defensive line is attacked simultaneously from 3 or 4 cardinal directions (north/south/east/west) by enemy troops positioned adjacently on the grid, each attack against it gets a damage multiplier of +30%. In other words, positioning your own troops to encircle an isolated enemy unit significantly increases the effectiveness of the attack against it.
- Smart Support and adjacency bonus: instead of attacking directly, a unit may automatically decide (if it's more advantageous) to "support" an adjacent ally engaged in combat, granting it a +10% attack bonus for that round, instead of striking the enemy itself. This decision is made automatically by the combat AI, depending on grid position and tactical situation.
- Morale and retreat: each group of troops at a position has a morale value (default 80 for the attacker and 100 for the defender, calculated at the start of the battle). If one side has at least a 2:1 superiority in a certain advanced troop type (planes, or tanks/artillery — only in normal attacks, not raids), the favored side's morale increases by 30%, while the disadvantaged side's morale decreases proportionally (divided by 1.3), with a maximum cap of 100 for the attacker's morale. If, during a combat round, the percentage of troops lost from a defensive position reaches or exceeds that position's current morale value, the remaining troops at that position retreat from combat (they aren't eliminated, but removed from formation, kept as survivors), and the attacking position that caused the retreat gets a +20 bonus to its own morale.
Conquering a city
- The attack must decisively win the battle.
- If the city is already under siege, the situation depends on who is attacking:
- if the attacker is the same player (or an ally/coalition member of the one already besieging), the attack converts into a reinforcement for the existing siege;
- if there's a Non-Aggression Pact (NAP) between the attacker and the besieging side, the attack is canceled and the troops return (no battle opens to break the siege);
- if the attacker is from the opposing side and wins the battle, the current siege can be broken.
- Upon successful conquest:
- The city changes ownership.
- Coalition events are generated for both sides ("Ally conquered the city at X,Y" / "Ally lost the city at X,Y").
- If the player who lost the city ends up with 0 cities, they are automatically kicked from the coalition; if they were the coalition's leader (General), leadership automatically passes to the remaining member with the most points.
- If it's part of a coalition war, the war progress is updated and may trigger the attacker's automatic victory.
- If a player ends up with no cities at all, they are redirected to the option to restart.
11. Attack Interceptions
An interception is a mission through which you quickly send an air force to meet an enemy attack before it reaches its target.
Conditions to send an interception
- The attack you want to intercept must already be detected by the city from which you're launching the interception (otherwise the order is rejected).
- The time remaining until the attack arrives must be within the 5 minutes - 60 minutes window.
- You must select a valid strategy for the interception (mandatory).
- You can only use air troops allowed for interception: Spy Plane, Fighter, Close Air Support, Bombing Plane.
- You need enough oil for the distance to the meeting point.
- You need enough rations if the movement crosses game days (daily consumption, as with other movements).
- You can also include reinforcements only if you have the right to command them; otherwise the interception is rejected.
How to detect an attack (in order to intercept it)
- Instant detection: if you have spies infiltrated in the city the attack is launching from, the attack becomes immediately visible to your city.
- Automatic detection upon approach: if you don't have spies infiltrated there, the attack is automatically shown when it enters the "close to target" phase, usually about 10 minutes before impact (and for very short attacks it may appear almost immediately).
- Detection through patrols: your patrols can discover it earlier, depending on the patrol's composition and its range/duration; upon detection you receive a report and the attack appears in the list of detected attacks.
What happens at the outcome
- If the interception wins, the enemy attack is destroyed and never reaches its destination.
- If the battle ends in a stalemate, the enemy attack continues on its way (it isn't stopped), and the interception's surviving troops retreat toward the origin city.
- If the interception loses, the enemy attack continues toward its original target, and the interception's troops are destroyed.
- If, by the meeting point, the enemy attack has already been canceled/destroyed/starved for another reason, the interception no longer fights and returns.
- After the confrontation, survivors return according to the return rules, and players receive the corresponding reports.
12. Patrols
Patrols are active air/ground reconnaissance missions, used to detect enemy movements around the city.
- Maximum 3 active patrols simultaneously per city.
- A patrol's duration is configurable (1-12 hours), as is its range of action.
- Oil cost (in short): the game first adds up the oil consumption of all troops sent on patrol (this is the "total consumption"), then multiplies it by the patrol's duration and by 5.
- Simple formula:
Oil required = total consumption × number of hours × 5. - Example: if the patrol has a total consumption of 12 and lasts 3 hours, the cost is
12 × 3 × 5 = 180oil.
- Simple formula:
- Chance of detecting an attack that enters the patrol's range: each troop type has its own detection score, and the game adds them up into a final percentage (adjusted by the
duration / rangeratio).- In short, time and range factor in through the
duration / rangeratio: longer duration increases the chance, larger range decreases it (with the same troop composition). - Practically: with the same troops,
12h / range 3offers a higher chance than6h / range 3, and6h / range 1offers a higher chance than6h / range 3. - Important trade-off: a large range gives you better coverage and more detection moments along the route, but each attempt has a slightly lower percentage than at a small range.
- When an attack approaches, the game doesn't do a single check, but checks at range thresholds (max 3): upon entering range 3, then range 2, then range 1.
- This means, in practice: a patrol with range 3 can have up to 3 detection attempts; with range 2 up to 2 attempts; with range 1 a single attempt.
- If the attack starts already very close (not covering enough tiles), fewer checks than the maximum above are made.
- At each such check, the same patrol percentage is used to decide detected / not detected.
- In short, time and range factor in through the
- Attack on Sight: if you enable this option on a patrol and it detects an enemy attack entering its range, the patrol automatically attacks the intruder — the result can be the destruction of the enemy attack or, if the patrol loses, the destruction of the patrol's own troops.
- If the patrol's battle ends in a stalemate: the enemy attack isn't stopped and continues on its way, and the patrol remains with the troops that survived the confrontation.
- Patrols consume rations like any other mission with troops: when you send the patrol, it's allocated a ration stock, and then consumption is applied at the daily check (at midnight, server time). If the stock doesn't cover the requirement at the check, the patrol loses Power (up to -25 per check). Since the maximum patrol duration is 12 hours, in practice it can only catch a single midnight check, so the maximum loss on a patrol is -25 Power.
13. Espionage
Espionage missions are carried out with Spy units (or Spy Plane for aerial reconnaissance) and include:
| Mission | Description |
|---|---|
| Infiltration | Places hidden spies in a target city |
| Counter-espionage detection | Scans your own city to discover infiltrated enemy spies |
| Intelligence report generation | Spies gather information about troops, resources and buildings in the target city |
| Building destruction | Sabotage with infiltrated spies that can destroy levels of a target building |
| Poisoning/Troop destruction | Sabotage of a chosen troop type: soldiers are killed, and vehicles/planes are destroyed |
Success and detection rules
-
Terms used in calculations:
- Attacking spies = the spies you send on the mission.
- Defending spies = the spies already present in the target city.
- Luck = a random value between
-30and+30, applied to each mission.
-
Infiltration (sending spies into a city):
- Step 1: the force ratio is calculated
R = attacking spies / defending spies. - Step 2: the ratio is adjusted with luck:
R_adjusted = R × (1 + luck/100). - Step 3: the infiltration chance is calculated non-linearly:
chance = (R_adjusted^2.5 / (R_adjusted^2.5 + 1)) × 100. - Step 4: the game does a random roll (
1..100) and compares it with the final chance.
- Step 1: the force ratio is calculated
-
When the target city has no defending spies at all:
- Infiltration starts at 100% chance.
- Practically, it's guaranteed unless the instant detection mechanic below intervenes.
-
Instant detection at departure (a very important mechanic):
- If the player you're attacking already has spies infiltrated in your city, your infiltration mission is immediately marked as "detected".
- In this case, the final infiltration chance is halved.
- Consequence: instant detection doesn't mean automatic failure; it means a much lower chance + a detection report for the defender.
- Example: an initial chance of
100%(target without defenders) becomes50%if instant detection occurs.
-
Infiltration result:
- If the mission succeeds, the sent spies are added to the network of infiltrated spies in that city.
- If the mission fails, the sent contingent is lost.
-
Counter-espionage detection (scanning your own city):
- The same base logic is used: force ratio + luck + non-linear curve.
- The spies sent for detection are compared with the enemy spies infiltrated in your city.
- Upon success, the enemy operation is discovered, and the adversary's infiltrated spies are eliminated.
- If the calculated chance crosses the clarity threshold (practically above
40%), the report clearly shows the identity/source city. - Below this threshold, the report remains anonymous (without full identification).
-
Losses during counter-espionage detection:
- In case of a successful detection, the mission may also have its own spy losses.
- Own losses are limited to at most
90%of the spies sent for detection.
-
Basic practical rule:
- Large numerical superiority quickly increases the chance.
- Large numerical inferiority reduces it sharply.
Spy Attack (aerial)
Besides classic infiltration missions with Spy units, you can send a spy attack — an aerial incursion whose sole purpose is obtaining information about the target city, not looting resources or destroying buildings.
- It must be sent with at least one Spy Plane — without it, the attack cannot be launched.
- Besides the spy plane, you can accompany the mission with Fighters and/or Close Air Support, as escort — no other unit (infantry, armor, other planes) can participate in this type of attack.
- If the target city has air defense (planes or Anti-Air) capable of repelling the incursion, an air battle is fought; if the defense wins, the sent spy planes are destroyed and the mission fails.
- If the incursion succeeds, you receive an intelligence report about the target city (buildings and troops located there), similar to the one obtained through classic spy infiltration.
- When each type of report is generated (full vs partial):
- A full report is generated when the spy attack is NOT detected by the target's anti-air defense (the game does a roll; if not detected, you receive the full report directly and the mission doesn't enter the classic repelling air battle).
- A partial report is generated when the spy attack is detected, but after the air battle the result favors the attacker (the attacker wins the confrontation).
- If the spy attack is detected and the attacker does not win the battle (loses or ends in a stalemate), no useful intel report is generated for the attacker; only the battle/detection result remains, and the mission ends without useful information for the attacker.
- How spy attack detection is calculated (what's taken into account):
- The system takes into account the total number of Anti-Air units in the target city (including controlled reinforcements located there).
- First, a base detection chance is calculated, which increases with Anti-Air units, but has a maximum cap of 80%. Practically, around 300 Anti-Air you reach this cap (from that point on, the base doesn't increase past 80%).
- On top of this base, a modifier from the attacker's luck applies (luck in the range -30 ... +30):
- positive luck decreases the detection chance;
- negative luck increases the detection chance.
- The maximum effect of luck on detection is about ±15 percentage points.
- The final chance is capped between 0% and 95%, then the game does a random 0-100 roll for the final verdict (detected / not detected).
- The accuracy of the report from a spy attack is displayed as an "approx." range and doesn't always represent exact values:
- Full report = the incursion gives you ample information about the target (in practice you see a "full" report, with more useful details about troops/buildings). The base accuracy is around 70%-90%.
- Partial report = the incursion only gives you part of the information (in practice you see an incomplete report, with estimated/fewer data). The base accuracy is around 50%-70%.
- The range is adjusted by the luck factor shown in the report (it can shift the range by up to about -10 / +10 percentage points).
- Because of this, in practice you can see weaker ranges (e.g., ~40%-60%) or very good ones (up to ~90%-100%), depending on the outcome and luck.
- No resources are stolen and no buildings are damaged in a spy attack — the only possible outcome is the intelligence report (or failure and the loss of the sent spy planes).
14. Reinforcements
You can send your own troops to an allied city (or your own, if you have multiple cities) to defend it. When sending, you choose, from a single menu, one of 3 options that determine what the host city can do with the received troops (exact names from the interface):
| Option when sending | What it means |
|---|---|
| "Cannot leave the target city" | The troops defend the host city, but cannot be sent by it on any of its own missions (neither attack, nor further as reinforcement). |
| "Can go on missions, except reinforcements" | The host city can send these troops on attacks/patrols/expeditions etc., but cannot resend them further as reinforcement to another city. |
| "Can go on any mission" | The host city can use the troops without restriction, including resending them as reinforcement to another allied city, forming a reinforcement chain (useful for quickly moving a force through several cities, one after another). |
Rules
- The target city's owner decides who can send reinforcements to it, through a configurable setting directly in that city's Fortifications (Wall) building interface (a per-city setting, not per-coalition): only members of one's own coalition and an allied coalition, anyone, or no one (if both acceptance options are disabled, reinforcements are automatically rejected).
- Exception — a city under siege: if the target city is already under siege (someone is conquering it), the permission check above is completely ignored — you can send a reinforcement there regardless of the owner's setting in Fortifications, so that anyone can rush to help the defense. (Separately, if you or a member of your own coalition or an allied coalition instead send an attack — not a reinforcement — to a city already under a siege that belongs to you, that attack automatically converts into a reinforcement and joins the existing siege; "ally" strictly means a fellow coalition member or a member of an allied coalition — a simple Non-Aggression Pact (NAP) does NOT qualify for this conversion. See section 10, "Conquering a city".)
- Oil is consumed during the movement, just like with any other troop movement; if the route crosses midnight, the daily ration/Power check described in section 5 also applies.
- Recalling troops: the one who sent the reinforcement can recall it at any time, as long as the troops aren't busy with another active action (for example, sent by the host city on an attack, if it had permission) or still en route to the destination.
- Rejecting troops by the host: the host city's owner can at any time send back (expel) a received reinforcement, regardless of who sent it.
- Once stationed, a reinforcement restores its Power every night at the host city's expense, if it has available rations (see section 5).
15. Expeditions
Expeditions send troops (requires the General's Office) to explore, with a chosen duration from the set: 1, 2, 4, 8, 16, 24, 32, 40, 48 hours.
- Costs oil (calculated for the entire round trip) and rations (if the expedition crosses midnight, server time) for its entire duration.
- Simultaneous expedition slots: equal to the General's Office building's level — at level 1 you can have 1 active expedition at a time, at level 2 you can have 2, and at level 3 (max level) you can have 3 active expeditions simultaneously.
- At the end, a random outcome is drawn from among 4 possible categories:
| Category | Examples | Result |
|---|---|---|
| Nothing | — | The expedition returns with no result |
| Resource discovery | Iron deposit, oil well, aluminum reserve | You gain a random amount of a resource |
| Hostile encounter | Barbarian raiders, mercenary band | Battle against a randomly generated enemy force |
| Friendly encounter | Stray soldiers, armored survivors | The troops encountered join your army |
- The chosen duration influences the outcome: a longer expedition has a lower chance of finding "nothing" and can bring bigger rewards on resource discoveries, compared to a short one.
- If a hostile encounter during an expedition ends in a stalemate, the expedition isn't considered a victory: your troops only return with the survivors.
16. Weather
Weather changes automatically every day, at midnight (server time) and affects combat efficiency for all players equally. Each weather type provides bonuses or penalties specific to certain troop categories (infantry / armor / aviation):
| Weather | Exact effect |
|---|---|
| Sunny | +5% attack for armor and aviation |
| Rainy | -5% attack and -10% movement speed for aviation and armor |
| Muddy | -10% attack and -15% movement speed for infantry and armor |
| Storm | -20% attack and -20% movement speed for aviation |
| Dog-Days (heatwave) | -20% attack and -20% movement speed for infantry and armor (overheated crews) |
- Special rule: a Rainy day is always followed the next day by Muddy weather (the ground remains soaked from the rain) — the rest of the weather types are chosen randomly.
- Current weather and the remaining time until the next change are shown in the interface's top bar.
17. Effects (Buffs/Debuffs)
Effects are temporary bonuses or penalties (standard duration: 24 hours) that can be applied to a player.
The complete list of effects that exist in the game, with the exact bonus/penalty:
| Effect | What it does exactly | Source |
|---|---|---|
| Improved Parts | +40% attack | Item from the shop (or Battle Pass reward) |
| Increased Labor | +25% to all 3 resource productions (metal/oil/aluminum) | Item from the shop (or Battle Pass reward) |
 Disorganization Disorganization |
-10% attack | Automatically applied to all other members of a coalition, the moment the leader/rank with kick permission kicks a member from the coalition |
 Incompetence Incompetence |
-10% anti-infantry defense, -10% anti-armor/artillery defense, -10% anti-air defense | Automatically applied to the kicked member, the moment they are kicked from the coalition |
 Betrayed its own kind Betrayed its own kind |
-50% attack | Automatically applied to a player who voluntarily leaves their coalition while it's in an active war |
| Lost the war | -15% anti-infantry defense, -15% anti-armor/artillery defense, -15% anti-air defense | Automatically applied to all members of the coalition that loses a coalition war |
 Honorless traitors Honorless traitors |
-50% ration consumption on movements and -15% troop recruitment time | Automatically applied to the coalition that gets attacked (betrayed), the moment a war is automatically triggered through betrayal (see the "War System" section below) |
| Blitzkrieg | +15% attack and 20% faster movement | Automatically applied to the coalition that attacks (betrays) an own ally/NAP partner, the moment a war is automatically triggered through betrayal |
 Broke his promise Broke his promise |
-40% attack | Defined in the game, but currently inactive — there is currently no in-game situation that triggers it |
- Effects do NOT stack: if you try to activate an effect from your inventory that is already active on your account, the game completely rejects the action — nothing happens at all: the existing active effect remains unchanged until it naturally expires (it isn't extended and isn't recalculated), and the used item is not consumed from the inventory (it remains available to be used later, after the current effect expires).
- The only exception is the Premium Account, which isn't treated as a regular "effect", but as a separate status: if you activate it again before the current one expires, the duration is extended directly from the existing expiration date (the remaining time isn't lost and isn't reset).
18. Coalitions, Diplomacy and War
Coalition structure
- Roles: Member, Lieutenant, General (founder/leader).
- Configurable permissions per role: send messages to everyone, diplomacy, invitations, kicking members, modifying member rights, modifying the coalition, dissolving the coalition.
- The maximum number of members in a coalition is 50.
- To create a coalition, you need a minimum of 50 total points (the sum of points of all your cities) — a value configurable per server.
Coalition events
- Paginated log (10 events/page, newest first): member joins, war declarations, conquered territories, alliances formed — updated in real time.
Coalition chat
- Messages are shown in real time to all members and can be browsed in history, 100 messages per page (older history isn't lost, it's loaded on demand, page by page).
Diplomatic relations
| State | Effect |
|---|---|
| Alliance | Allied coalitions see each other's troop movements and can send reinforcements |
| Non-Aggression Pact (NAP) | Signatory members cannot attack each other |
| War | Active conflict, with a progress counter |
| Peace Treaty | War resolution: white peace, tribute, victory through progress, or complete destruction |
War system
-
A war between two coalitions can start in two ways:
- Classic war declaration — initiated only by the coalition's General rank (or higher), against another coalition.
- Automatically, through betrayal — if attacks between the two coalitions are explicitly allowed between allies/NAP partners (the coalition setting that allows attacking allies) and someone actually attacks an ally/NAP partner, the alliance/NAP is automatically broken, and a war automatically starts between the two coalitions, with immediate effects applied to both sides: the coalition that attacked receives the Blitzkrieg effect (+15% attack and 20% faster movement for all troops), while the attacked (betrayed) coalition receives the Honorless Traitors effect (-50% ration consumption on movements and -15% troop recruitment time). Both effects last 24 hours from application (the standard effect duration, see section 17). A war started through a classic declaration does not apply these initial effects.
-
War objectives (goals): each war has 3 possible objectives, displayed with their name and description to the involved players:
| Objective | Displayed description | Exact completion threshold |
|---|---|---|
| Glory built with blood | The coalition has killed a large number of enemy population (troops) | The coalition kills a total of 100,000 population (troops) belonging to the enemy coalition |
 Attack is the best defense Attack is the best defense |
The coalition has won a large number of attacks against the other coalition | The coalition wins a total of 150 attacks against the enemy coalition |
 Collapse Collapse |
The enemy has lost a large percentage of the cities it had at the start of the war | The enemy coalition loses 70% of the number of cities it owned at the start of the war |
- Each objective completed by a coalition earns it 1/3 (~33 points) of the total war progress (0-100 scale).
- The Collapse objective's completion is automatically checked every time a coalition conquers a city from the other side (it calculates what percentage of the cities the enemy had at the start of the war have already been conquered).
- When a coalition's progress reaches 100 (i.e., all 3 objectives have been completed), that coalition automatically wins the war: the defeated coalition is automatically dissolved, and its members receive the Lost the war penalty effect (-15% anti-infantry defense, -15% anti-armor/artillery defense and -15% anti-air defense, for 24 hours from application).
- Peace proposal: at any point during the war, a player with diplomacy rights can propose one of the following options:
- White peace — the war ends with no additional conditions.
- Peace with tribute — the proposer chooses a tribute percentage between 30% and 50%; if accepted, the "defeated" coalition (the one paying tribute) pays that percentage of its hourly production (see below).
- Peace tribute: if the accepted peace treaty includes tribute, each city of the defeated coalition gives up the set percentage (30-50%) of its own hourly production of metal, oil, aluminum and rations — it isn't a tribute calculated centrally for the coalition, but applied individually, city by city. Resources given up by each city are redirected to the winning coalition (broken down per beneficiary member/city as well). The tribute is applied automatically for exactly 7 days from the peace acceptance, after which it automatically stops for all involved cities.
19. Tension and Abandoned Cities
- Prolonged inactivity: if a player doesn't log in for 30 days, all their cities automatically become "rebel" cities (control taken over by AI), and the account is marked as abandoned.
- Tension from negative population: a city's population becomes negative when the surplus of resources over Storage capacity (see "Surplus / Overflow" in section 4) suddenly blocks more population than the city currently has available. The risk increases especially if, while you have troops away from the city (on attack, patrol, expedition, etc.), you use the population freed by their departure to queue additional recruitments or constructions, and then the departed troops return. If a city ends up with negative population, civic tension in the city increases every night proportionally to half the absolute value of the negative population.
- If tension reaches 100, the city rebels and automatically becomes a rebel/barbarian city — you lose control of it.
- If population becomes positive again, tension resets completely to 0.
- Recommendation: avoid staying with negative population for a long time — check your city's rations and population capacity.
Barbarian Cities
- These are AI-controlled cities (either generated from the server's start, or resulting from abandonment/tension).
- They appear colored gray on the map and can be freely attacked/conquered, without the normal diplomatic restrictions.
20. Achievements
Over 50 achievements, divided into categories: Combat, Espionage, Economy, Construction, Troops, Coalition, Conquest, each with a rarity level (normal / uncommon / rare).
Examples:
- First Blood — first victory in an attack.
- Warmonger / Veteran Commander — repeated victories in attack (25 and 100, respectively).
- Iron Wall / Stalwart Defender — victories in defense.
- Fortress — Main Building at level 20.
- Coalition Founder — founding a coalition.
- Conqueror — first city conquest.
Progress is tracked automatically per server; achievements are also aggregated at the account level (across all servers).
21. Battle Pass
- Each season has rewards on a free track (available to everyone) and on a premium track (requires unlocking with Premium Points).
- XP accumulates on a progression curve that requires increasingly more XP as you level up. The XP sources and exactly how many points they give:
- Troop recruitment — for each recruited unit: 1 XP for infantry, 2 XP for armored vehicles, 3 XP for planes.
- Construction — upon completing a building upgrade, you receive XP equal to the score points that upgrade grants.
- Expeditions — if the expedition has a hostile encounter and you win, you receive XP for each enemy troop killed, calculated with the same grid as recruitment (1/2/3 XP, depending on the killed troop type).
- Real battles (attack/defense) — XP calculated based on enemy troops killed (same 1/2/3 grid), divided proportionally between the city's owner and any allies who sent reinforcements, based on how many troops each contributed to the battle.
- Rewards must be claimed manually.
- At the end of a season, a new season starts automatically.
22. Shop, Premium Points and Premium Account
Premium Points
- Obtained through real purchases with real money, or as in-game rewards (achievements, Battle Pass, directives).
- Used for: instantly completing constructions/recruitments, reducing order time, buying shop items, unlocking the premium Battle Pass track, changing your username (50 Premium Points, once every 24 hours, unique name of 4-32 alphanumeric characters).
Shop items (examples)
- Instant resource boosts (e.g., +5000 Metal/Oil/Aluminum/Rations).
- Instant troop packages (e.g., +100 Infantrymen, +50 light/medium tanks).
- 24h temporary effects: attack bonus, resource production bonus.
- Premium Account — lasts 24 hours per activation; if you buy it again before it expires, the duration is extended directly from the current expiration date (the remaining time isn't lost). While active, it grants:
- +25% production on all 3 resources (metal/oil/aluminum).
- Increased order queue capacity, from 2 to 5 simultaneous orders, for: the construction queue and each recruitment queue separately (Barracks, Armored Factory, Plane Factory each have their own queue, all increased to 5 slots with an active Premium Account).
Purchase/use flow
- You buy the item with Premium Points.
- The item enters your inventory.
- You use it on a city/account — the effect applies immediately and its duration is tracked automatically.
23. Tutorial
- New players go through a step-by-step tutorial, with visual arrows indicating exactly which building/action to do next.
- The stages cover: constructions, recruitments, troop movements (attack/patrol), espionage missions, forming/joining a coalition, checking the weather and strategies.
- Progress is saved and can be resumed at any time (already completed steps are automatically marked as done).
- You can minimize the tutorial panel at any time and reopen it later from the side tab — progress remains saved regardless of whether the panel is open or minimized, and steps completed in the meantime are detected and automatically marked.
- Every new player receives the General Georgy Zhukov (+300% defense) for free, who is automatically removed when you reach 1000 points.
24. Rankings
- Player ranking: ordered by total accumulated points (sum of points of all your cities), automatically updated once an hour, at each fixed hour (e.g., 14:00, 15:00, etc.).
- Coalition ranking: ordered by the aggregated points of all members, updated at exactly the same hourly cycle and moment as the player ranking — both rankings are recalculated simultaneously, once an hour.
25. World Map
- The map is organized by coordinates (x, y); each city occupies a fixed position.
- Colors on the map: green = your cities, blue = allies, red = enemies, gray = barbarian cities.
- The distance between cities directly influences the travel time for any type of movement (attack, reinforcement, espionage, transport, expedition).
26. Messages and Reports
Report types
- Attack reports (complete result of a battle).
- Reinforcement reports.
- Espionage reports (result of infiltration/intelligence missions).
- Detection reports — generated both when detecting an infiltrated enemy spy (counter-espionage), and when detecting an attack by spies/patrols or an interception (attackIntercept) by spies.
- Trade reports (result of resource transfers).
- Shared reports — you can publicly share a combat report (for example, in the coalition chat).
The "Surprise Attack" bonus
- On an attack interception (attackIntercept) or a patrol with Attack on Sight, if the resulting battle wasn't "detected" in advance by the opposing side, the one launching the confrontation (the interceptor/patrol) receives a very large bonus: +100% attack.
- Advance "detection" strictly means one thing: the defender has spies infiltrated in the city the interceptor/patrol is launching from — if those spies exist, the surprise bonus disappears completely.
- In a normal attack (not interception/patrol), lack of detection produces a similar effect, but oriented toward air defense: if the defender doesn't have spies infiltrated at the attacker's location (so wasn't warned), their defending planes suffer a -20% attack penalty in that battle, on the grounds that they didn't have time to take off in time.
- Practical conclusion: the best countermeasure against surprise attacks (whether interceptions, patrols, or normal attacks) is to keep spies permanently infiltrated in your nearby enemies' cities — this cancels out the opponent's surprise bonus.
Messaging
- Private conversations between players, paginated, with unread message tracking.
- Live coalition chat, with full history available, browsed 100 messages per page.
27. Server Lifecycle
1. New server created → barbarian cities populated on the map
2. Active phase → players claim cities, develop, fight
3. Dominance warning → a coalition reaches 70%+ of the territory, checked automatically once a day
4. 10-day countdown → starts when a coalition crosses the 70% threshold; if at any daily check the percentage drops below 70%, the countdown is canceled and only starts again upon a new threshold crossing
5. Server shuts down → the winner is announced, rankings are frozen
6. Players are redirected to the page for choosing another server
28. Key Rules — Summary
- You can attack an ally/NAP partner only if your own coalition has explicitly enabled the option to allow attacking allies; if the attack actually happens, the alliance/NAP is automatically broken and a war starts between the two coalitions, with special immediate effects (Blitzkrieg for the attacker, Honorless Traitors for the betrayed side) — see section 18. A war started through a classic declaration (not through betrayal) doesn't apply these initial effects.
- You can freely attack any player who has no coalition, or whose coalition has no diplomatic relation (alliance/NAP) with yours; if there's an alliance or NAP between the two coalitions, the attack is blocked, except in the case described in rule 1 (explicit option to attack allies) or if a war is already declared between them.
- A Non-Aggression Pact (NAP) forbids direct attacks between signatories.
- A fixed 5% of the capacity allocated to each resource is always protected from looting, regardless of the Storage building's level.
- Maximum 3 patrols active simultaneously per city.
- Only movements in transit (not stationed cities or troops) can lose power from lack of allocated rations (up to -25% per daily check); at 0 power, the movement starves to death and troops are completely lost.
- Each building/troop has minimum level requirements for other buildings before it can be built/recruited.
- The number of simultaneous expedition slots is limited by the General's Office level.
- Conquering a city requires a decisive victory by the attacker; the Fortifications defense bonus is not taken into account during aerial raids, since the battle is fought exclusively in the air.
- Aerial raids require a Bombing Plane in the attacking force.
- Changing your username costs 50 Premium Points, with a 24-hour cooldown between two changes.
- Sustained negative population for too long leads to increasing civic tension and, at 100 tension points, leads to losing the city to rebel forces.
- Inactivity of 30+ days automatically turns all of a player's cities into barbarian cities.
- Resource surplus over Storage capacity blocks population (1 population blocked for every 50 units of total surplus) — this is also the main cause of negative population in a city.
- If you end up with no cities at all, you are redirected to the option to restart the game from scratch.